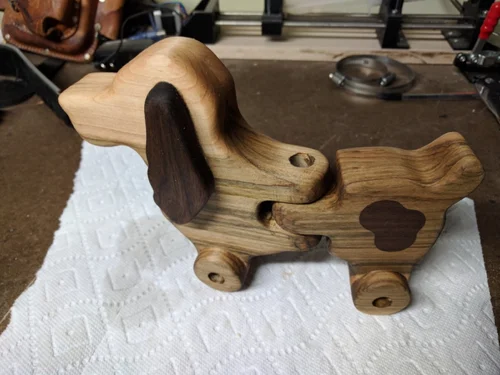
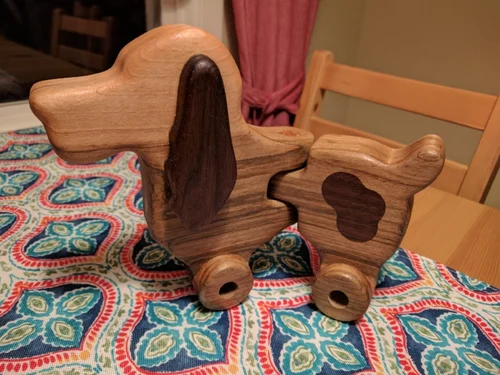
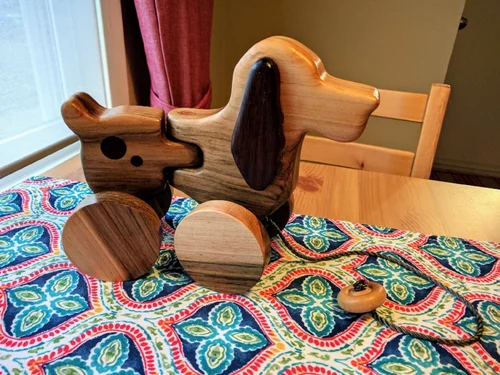
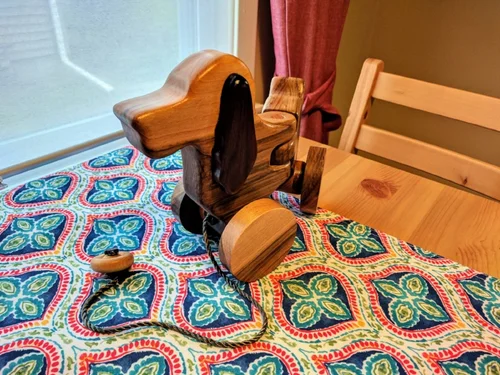
Wooden Pull Toy
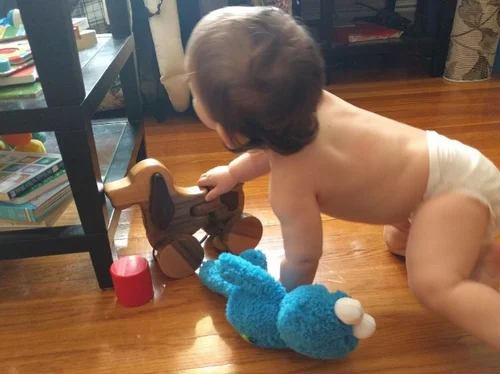
A gift for my nephew's first birthday.
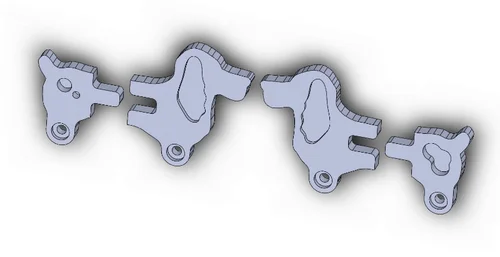
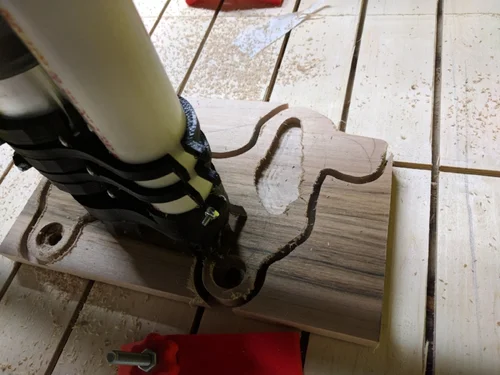
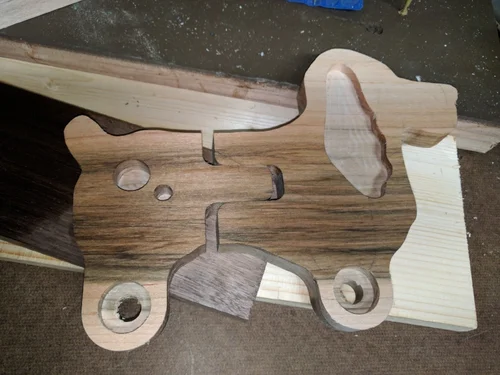
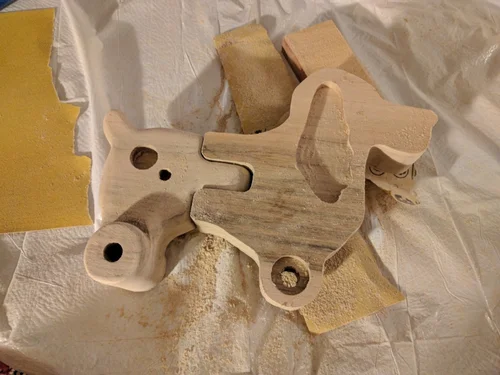
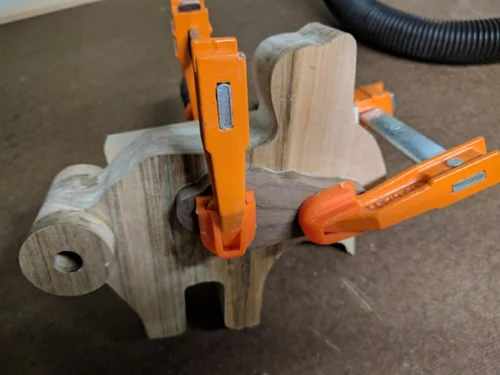
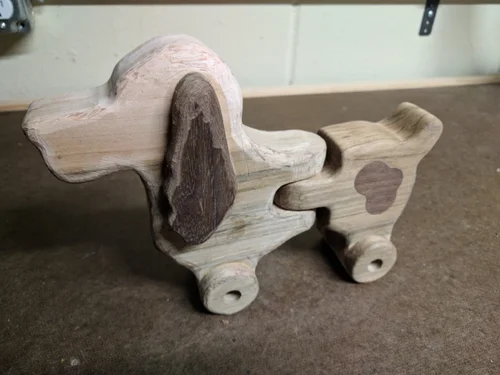
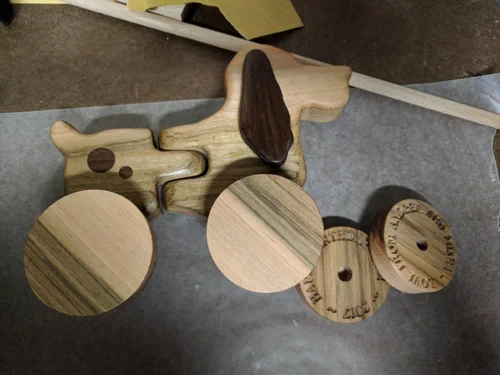
The design is inspired by a toy I discovered online and instantly adored. I used my CNC to cut the rough shape from a single board of maple, and created the inlay for the ears and spots with walnut.
Countless hours of sanding went into perfecting this toy. I finished it with a food-safe lacquer.
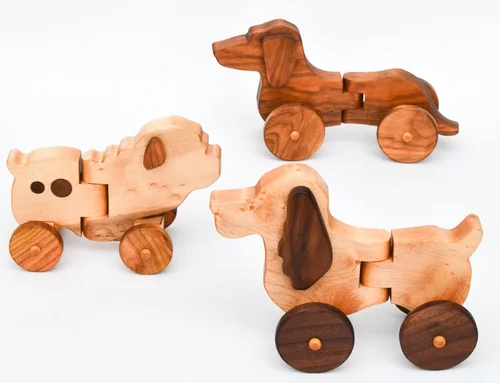
Tools Used: Illustrator, SolidWorks, Fusion 360, CNC
The direct inspiration for this project is the wood spaniel from this
online retailer:
http://www.adventure-in-a-box.com/product/wooden-spaniel-wheels-pull-to
y-dog-articulated-body/ 
The direct inspiration for this project is the wood spaniel from this
online retailer:
Linkhttp://www.adventure-in-a-box.com/product/wooden-spaniel-wheels-pul
l-toy-dog-articulated-body/
Design in Solid Works laid out to fit on a 1x8 board.

Design in Solid Works laid out to fit on a 1x8 board.
The toy was modeled in Solidworks and cut on my CNC out of a single 1x8
board of maple. 
The toy was modeled in Solidworks and cut on my CNC out of a single 1x8
board of maple.
The board I bought was only 3/4" thick so I cut a mirror of each part
and laminated them together. Doing this allowed me to machine in
pockets for the inlays and extended hubs for the wheels.

The board I bought was only 3/4" thick so I cut a mirror of each part
and laminated them together. Doing this allowed me to machine in
pockets for the inlays and extended hubs for the wheels.
I added a hub extension to push the wheels away from the body and give
the toy a wider, more stable base. In this photo you can see the
sanding process on the rear of the toy. So, so much sanding..

I added a hub extension to push the wheels away from the body and give
the toy a wider, more stable base. In this photo you can see the
sanding process on the rear of the toy. So, so much sanding..
The ears and spots were inlaid with walnut.

The ears and spots were inlaid with walnut.
For sanding I used a dremmel with a rough sanding bit to rough in the
shape then went back with 120 and 220 grit sand paper to smooth out the
form. 
For sanding I used a dremmel with a rough sanding bit to rough in the
shape then went back with 120 and 220 grit sand paper to smooth out the
form.
I drilled a hole for the center hinge and pull string. If I was
to do this again I would drill the hole from the bottom and stop short
of breaking through the top. The wood was finished with a couple
coats of Danish oil to bring out the

I drilled a hole for the center hinge and pull string. If I was to do
this again I would drill the hole from the bottom and stop short of
breaking through the top. The wood was finished with a couple coats of
Danish oil to bring out the natural grain of the maple.
For a final protective layer I put on a few coats of food safe lacquer.

For a final protective layer I put on a few coats of food safe lacquer.
The wheels are from the same board of maple. The rear wheels have
little inscriptions that will only be visible from the inside.

The wheels are from the same board of maple. The rear wheels have
little inscriptions that will only be visible from the inside.
All ready to be played with! 
All ready to be played with!
IMG_20170707_192016.jpg
image.jpg 