Engraved Gift Box
A birthday present for a friend who shares the love of India and specifically Indian spiced chai.
I bought a carved box from World Market and engraved our favorite masala chai recipe on the underside of the lid using my CNC and a v-bit engraving tool.
The box was filled with whole spices from a local Indian store. Based on the following recipe: http://www.food.com/recipe/indian-masala-chai-190932
Tools Used: Adobe Illustrator, Fusion 360, CNC
Beautiful carved box from World Market, appropriately made in India.
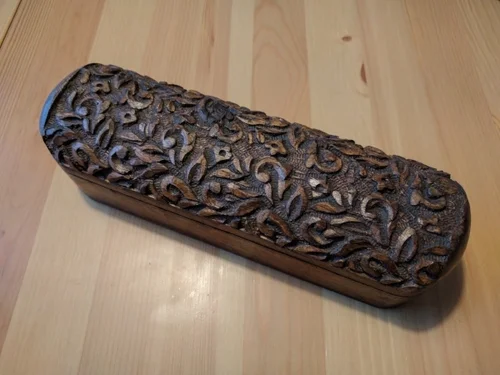
Beautiful carved box from World Market, appropriately made in India.
Test cutting on a piece of plywood, only one shot at the final box.
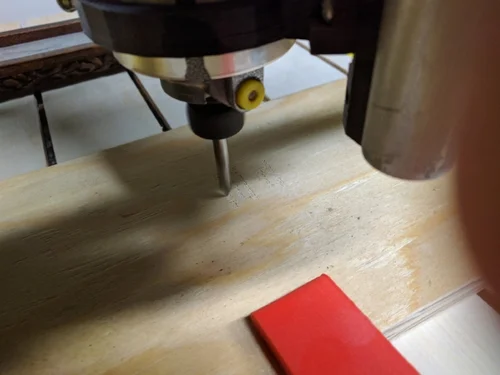
Test cutting on a piece of plywood, only one shot at the final box.
Engraving the text on the underside of the box lid.
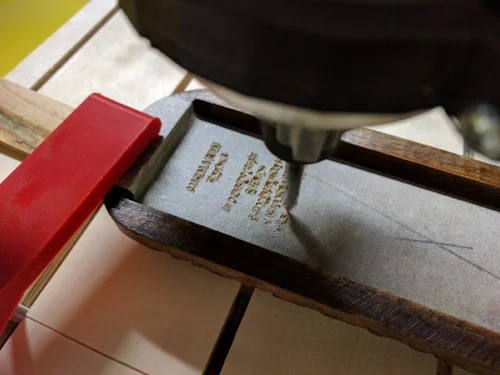
Engraving the text on the underside of the box lid.
Finished engraving. The depth of the engraving was a bit shallow
in a couple of spots and deep in others due to the underside of the lid
not being perfectly flat. 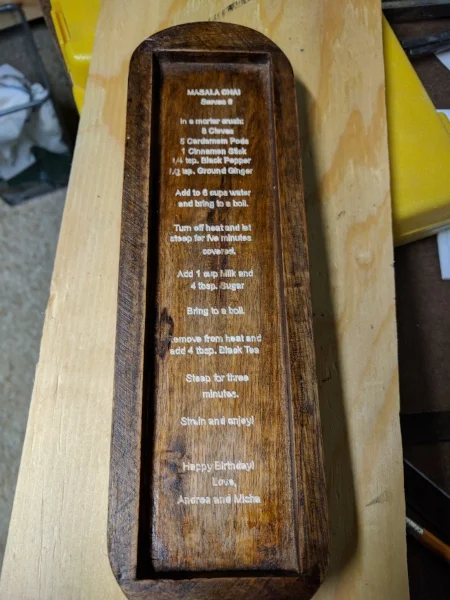
Finished engraving. The depth of the engraving was a bit shallow in a
couple of spots and deep in others due to the underside of the lid not
being perfectly flat.
Box with spices ready to be wrapped and gifted.

Box with spices ready to be wrapped and gifted.
DIY CNC
One of my passions is creating tools, and when I can use one tool to make another the fun is doubled.
My dad expressed an interested in getting a CNC for woodworking, and after a little research we decided to build our own. We decided on the LinkMostly Printed CNC from Allted on Thingiverse primarily due to the great design and low cost.
Printing the components, assembling the hardware, and figuring out the electronics took approximately four months of very infrequent weekend work. There is still a long road ahead learning a new software tool chain, but it will be a fun process.
Tools Used: 3D Printing
Printed Parts 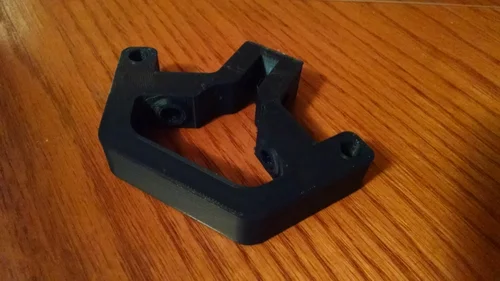 Printed Parts
The CNC was designed by Allted and published on LinkThingiverse in 2015. It uses a combination of printed parts, steel conduit tubing, and roller skate bearings for the motion chassis.
All plastic components were printed in PETG for its strength and
resiliancy.
Printing Parts and Collecting Hardware
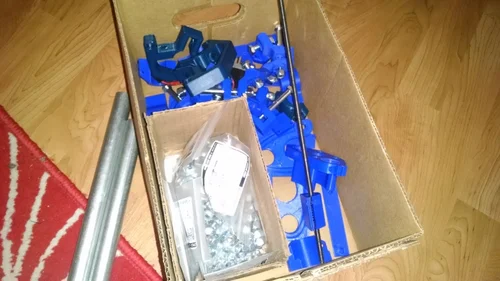 Printing Parts and Collecting Hardware
All together the parts took more than 100 print hours and 3 kg of PETG. Hardware was ordered online and conduit picked up at a local hardware store.
Due to having some components left over from building 3D printers, like
lead screws, power supply, and a few stepper motors the total BOM cost
came in under $250.
Central Carriage 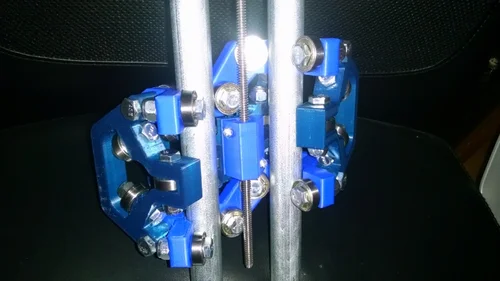 Central Carriage
This is the central z-axis carriage for the MPCNC, it is a beautiful
piece of engineering.
Basic Frame Assembled 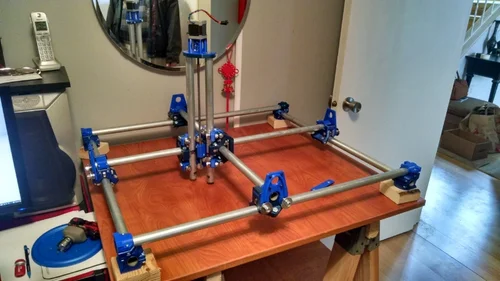 Basic Frame Assembled
Assembly of the frame minus the motion components.
Work Bed  Work Bed
To create the CNC work bed we used a side wall of an old oak cabinet. We drilled holes on a 2"x2" grid and hammered in t-nuts to be used for clamping the work piece. Motion Test
Moving around by hand to test for smooth motion and alignment.
Electronics 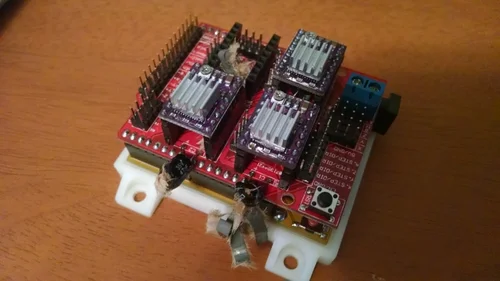 Electronics
The CNC runs on an Arduino Uno with a CNC Shield. What you see in this
photo is what happens when you accidently hook up the power supply
backwards and blow the capacitors.
Assembly Continued 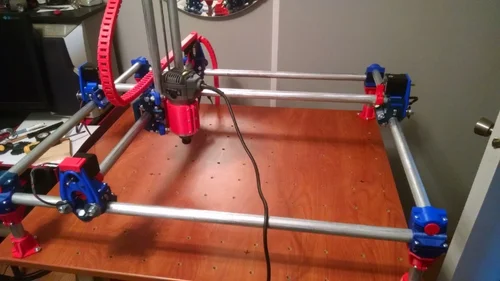 Assembly Continued
CNC squared and mounted to the work table. Cable chain was printed to
hold the motor wiring.
Installed 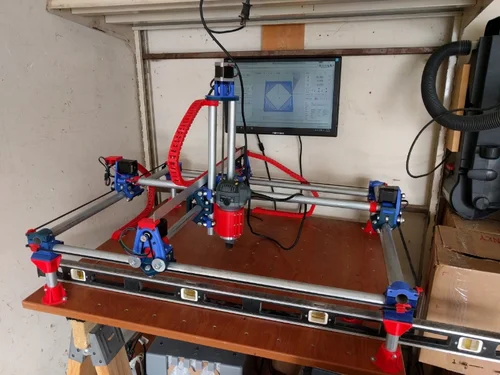 Installed
CNC installed in it's final home, a corner of the garage.
First cut 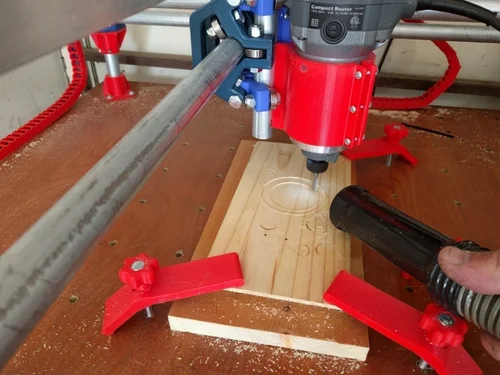 First cut
Making the first test cuts in some soft pine.
A little more advanced 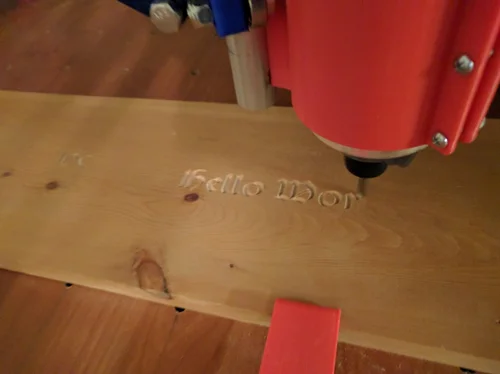 A little more advanced
Trying for something a little more interesting than circles.
Hello World! 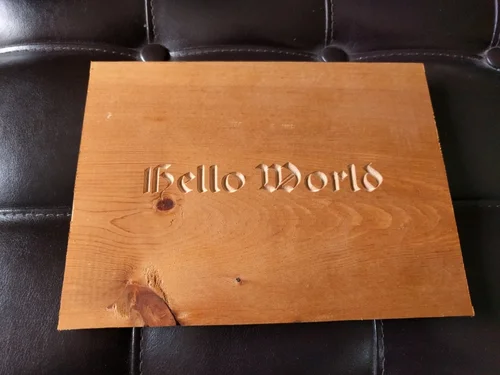 Hello World!
With the build complete, the next challenge is learning CAM software and coming up with interesting projects to cut!